Showing posts with label frugal. Show all posts

Sunday, November 18, 2012

Julian's Fresh Brussels Sprouts Salad


My Facebook friend Julian, who lives in London, posted the other day about how he was about to enjoy a raw brussels sprouts salad. Hmmmm.... I thought... I love salad. And coleslaw. And sprouts. Sounds perfectly delicious!!

Julian has an allotment garden, something that is rare in Toronto, where he grows his own sprouts. Can you colour me jealoooouuuuuse??  I made mine using sprouts from the store. I think fresher is better, so head to the farmer's market if possible.

Julian's garden

Julian's Fresh Brussels Sprouts Salad

INGREDIENTS
3 cups chopped or shredded raw brussel sprouts
1/2 cup pine nuts, lightly toasted
3 finely chopped spring onions
A handful of fresh chopped coriander (to taste)
Salt and pepper (to taste)
Juice of 1 lemon
pinch of sugar
1 tsp wholegrain mustard
1 T olive oil

INSTRUCTIONS
1. In a small bowl, whisk together lemon juice, sugar, mustard and salt and pepper. Slowly whisk in olive oil, until dressing comes together.
2. Trim ends from sprouts, and discard any tough outer leaves.  Chop finely or shred, using knife or mandoline. (If using mandoline leave ends on so that you have a "handle" of sorts to hang on to as you slice).
3. Lightly toast pine nuts in a non-stick pan, on medium-high heat. Toss around as toasting, and keep a close eye on them as they will burn quickly. Should be a very light brown colour once toasted.
4. Chop spring onions and coriander, and combine with sprouts. Drizzle with dressing and toss madly.
5. Gobble up.


Header image by Barbara Agnew, Flickr
Garden image by Julian

Thursday, November 15, 2012

Winter Chopped Salad (a holiday recipe)


Continuing on with our holiday (Thanksgiving) recipes, I want to share with you a fancy and delicious salad. There are many variations of this on the web, this is mine. The original recipe, I believe, comes from Epicurious. The salad features red cabbage and pomegranates, both very cheap this time of year.


WINTER CHOPPED SALAD
Serves 8

INGREDIENTS
4 c. chopped romaine lettuce
3 c. sliced red cabbage
1 Fuji apple, cored & diced
1 pear, cored & diced
1/2 c. pomegranate arils
3/4 cup almonds, toasted and coarsley chopped
1/2 cup crumbled feta cheese (optional)

DRESSING
1/4 cup red wine vinegar
1 1/2 tablespoons finely chopped shallot (or onion)
1/2 tablespoon honey
1/4 cup hazelnut oil or extra-virgin olive oil
Salt and pepper, to taste

INSTRUCTIONS

Dressing:

Whisk vinegar, shallot (or onion), and honey in small bowl to blend. Gradually whisk in oil. Season dressing to taste with salt and freshly ground black pepper.

Salad:

Combine lettuce and next 5 ingredients in very large bowl; toss to blend. Add dressing and toss to coat.  Divide salad among plates. Sprinkle with feta cheese, if desired, and serve.

Friday, November 9, 2012

Baked Beet BreadRoll


I have been exploring the Bengali supermarket around the corner from me, wandering down the aisles inspecting all the different ingredients and spices, and pestering the staff with questions on what they are and how to cook them. One day I will travel to India and Bangladesh and learn how to cook these dishes properly, but for now there is the web!

Thanks to Mr. Google I have bookmarked a few Bengali food blogs and will be experimenting with their recipes. It may take some practice, but it all looks SO good.

One of the blogs I am really enjoying is Bong Mom's CookBook, and since I picked up a 5 pound bag of beets today for 99 cents, I am now on the lookout for new beet recipes!  This is her recipe for Baked Beet BreadRoll, a snack for surprise visitors. I imagine you could also serve two or three rolls together with a green salad for a nice lunch or dinner.

Baked Beet BreadRoll
Recipe by Sandeepa of Bong Mom's CookBook

Ingredients

For the Stuffing
Red Beet - 1 and 1/2 of the medium sized ones. Chopped into small pieces and put in the blender to chop finely

Green Coriander Leaves ~ a quarter of a bunch chopped
Green Chillies ~ 4/5 chopped fine (optional)
Raisins or Kishmis ~ a fistful (about 20) soaked in water
Cashew or Kaju ~ 20 crushed
Salt
Garam Masala ~ 2 tsp heaped


For the Roll
Bread ~ a slice for each roll. Filling makes 12.
Butter ~ 1 tbsp melted
Egg ~ 1 beaten


Stuffing Instructions
  1. Chop the beet into small pieces and put them in the blender. Process them till they are chopped real fine, beet being solid you will not get a fine paste (you don't want that) but it will be granular.
  2. Heat oil. Use olive oil if you want.
  3. Add the chopped green chillies, the chopped beet, and sauté.
  4. Add the chopped coriander leaves, the raisins, the crushed cashew.
  5. Add salt & the garam masala.
  6. Sauté and cook covered for about 10 minutes till the beet is cooked. It will be lightly crunchy but totally dry.
Assembly Instructions

  1. Take a slice of bread (it is better to use wheat bread her mom says, but she only had White Bread at home).
  2. Remove the sides.
  3. Now comes a slightly difficult part. To make the bread pliable you have to sprinkle water on it and then press it between your palms to drain the water out. If you have already done this before it is easy, else it will take one or two attempts to get this right.
  4. Make a round from the stuffing and put it at the centre of the bread. Now mould the bread around the stuffing to make a roll or a round.
  5. Brush the rolls with little butter and the beaten egg. Use a brush lightly to do this.
  6. You can fry it at this point if you want. If you are frying no need to brush with butter.


To Bake

  1. Refrigerate for about an hour
  2. Take the roll out of the refrigerator and lightly brown them on both sides on a griddle or shallow frying pan.
  3. Heat oven to 400F
  4. Sprinkle corn meal (I used semolina/sooji) on the baking pan which has been lined with aluminum foil.
  5. Place the rolls on the baking pan and bake for approximately 45 minutes
  6. The baking time might vary, so check and bake till the roll is evenly browned
  7. Serve with hot Tea or Chai.


Photo Credit
Inani Beach, Bangladesh, by
Mohammad Hasan, Flickr

Tuesday, November 6, 2012

Scones

I go through Union Station each morning on the way to school and if you buy a scone there it will set you back $2.75. Wow. One a day, times 33 weeks of school, is almost $454 worth of scones. Add a large coffee and it adds up to $783 per school year. That would be a lot of groceries!! Or pay my rent for one month!

Here's how to make scones at home. It is SO easy. And you know exactly what is going in to them.

I don't have my mom's scone recipe, but this recipe, from allrecipes.ca, is very close to how I remember them.


Scones
A scalloped scone (or cookie) cutter

3 cups all-purpose flour
1/2 cup white sugar
5 teaspoons baking powder
1/2 teaspoon salt
1/2 cup raisins (optional)
3/4 cup butter or margarine
1 egg, beaten
1 cup milk

Preheat oven to 400 degrees F. Lightly grease a baking sheet.

In a large bowl, combine flour, sugar, baking powder, raisins, and salt. Cut in butter. Mix the egg and milk in a small bowl, and stir into flour mixture until moistened.

Turn dough out onto a lightly floured surface, and knead briefly. Roll dough out into a 1/2 inch thick round. Using a scalloped scone (or cookie) cutter (or an inverted drinking glass) cut scones out from dough.  When you have only scraps left, make another ball, and flatten to 1/2 inch. Keep cutting out scones. If you like the North American style of scones, simply divide round into 8 by scoring lightly with a knife. Place on the prepared baking sheet.

Bake 15 minutes in the preheated oven, or until golden brown.


Monday, November 5, 2012

Lentil Eggplant Chile Mole

Ahhhhh.... Mondays.

Open All NightMondays are hard for me. I'm a natural night owl, so I stay up very late on weekends. It's not unusual for me to up be up until 3, 4 or even 5 a.m. I sleep until noon, and then get up and on with the day.

But I can't do this on weekdays, as I have to be at school for 9 a.m.  And I have a long commute, a very long commute.  So when Monday rolls around I have to switch from being a night owl to... what's the opposite of a night owl... a day owl??!!?

I commute 4 hours daily.

2 hours there, and 2 hours home again.

I live in Toronto, but go to school in Oakville. It is not so far if you drive, but I take public transit. Which means taking the subway to Union Station, the GO train to Oakville, and then Oakville transit to campus.  And the GO train, going against commuter traffic, only goes once an hour.

I get up at 5:30 a.m., leave the house at 6 a.m., and get to school at 8 a.m.  I'm usually home by about 4:30 or 5:00 p.m., except for Tuesday's when I have afternoon classes and am not home until 7:30 p.m.  Mondays to Thursdays I am totally knackered from all that learning, commuting, and homework.

Which is why I am thrilled to open the fridge and find dinner waiting for me!

aubergine Tonight it was Lentil Eggplant Chile Mole, which I prepared yesterday and reheated tonight as I got into my PJ's.  I found the recipe when I googled lentils and eggplant, as I had both sitting around and thought they might go nicely together. I also make a lovely lentil eggplant curry, but I was in the mood for something new.

I made some modifications to the original recipe by making it a little spicier than originally called for. If you don't like spicy food, you can leave out the hot cherry pepper, the chipotle sauce, and the red pepper flakes, and use a mild chili powder. As it is, this is nice and fiery!!


Lentil Eggplant Chile Mole
Adapted from a recipe by Isa Chandra Moskowitz


2 medium or one large eggplant, cut into 3/4 inch cubes
1 T olive oil
1 medium onion, diced medium
1 hot cherry pepper (remove seeds and membrane, then cut into small dice)
1 red pepper, diced medium
4 cloves garlic, minced
1 tablespoon chili powder
3 teaspoons ground cumin
3 teaspoons ground coriander
2 teaspoons dried oregano
1/2 teaspoon ground cinnamon
1 teaspoon hot chili flakes
2 teaspoons chipotle sauce (**I get this in tiny cans at No Frills,
if it's not available you can leave it out)
3/4 teaspoon salt
2 tablespoons unsweetened cocoa powder
1 cup lentils, red or green, washed
4 cups vegetable stock
1 15 oz can diced tomatoes
2 teaspoons sugar

Preheat a 4-quart soup pot over medium high heat. Saute onions and bell pepper in oil until translucent, 5 to 7 minutes. Add garlic and finely diced hot cherry pepper, and saute for another minute, using a splash of water or stock if it's sticking. Be careful with the hot cherry pepper. Although most of the heat is in the seeds, you will get some natural oils on your skin. After  handling the pepper do not put your hands near your eyes. Wait until you have washed your hands thoroughly. Mix in chili powder, chili flakes, cumin, coriander, oregano, salt and cinnamon. Add 1/2 cup of the vegetable broth and the cocoa powder; cook for about 1 more minute, while stirring, to dissolve the cocoa.

Add lentils, vegetable broth, diced tomatoes and eggplant. Cover pot and bring to a boil, keeping a close eye. Once it's boiling, lower heat to a simmer and cook for about 40 minutes, until lentils are tender and eggplant is soft. Mix in sugar. Taste for salt and seasoning.

I found this quite bitter the first day, with a slightly unpleasant cocoa taste. I've never added cocoa powder to chile before, and wondered if this was how it was supposed to taste. And I was worried, because I can't afford to throw out food, and I wondered how I might save this dish. But after a day in the fridge, when all the flavours had the chance to blend together,  I can vouch that it is absolutely DELICIOUS!!! I will definitely be making this again!!!

What did you have for dinner tonight?

Sunday, November 4, 2012

Roasted Squash Quesadillas

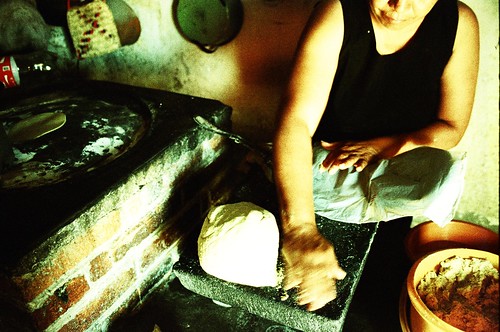
tortillas artesanales
Photo by Loborroso (Flickr)
Traditional tortilla making, in Mexico

I've noticed that there is a myth floating around that you have to dedicate a TON of time to preparing healthy and cheap food. That couldn't be more wrong, in my experience.

I am a full-time student in a very busy program... we have multiple assignments due almost every week, ones that take quite a bit of time to prepare and execute. Today I was prepping and shooting vegetables for a "colour theory" assignment, as well as a still-life. Yesterday I was out for 4 hours shooting over 1,500 photos for a timelapse video due next week. Not complaining, mind you, I love being in school learning more about something I am passionate about. But I don't have a lot of spare time.

Here's my go-to dinner for when I am tired, busy or just plain lazy.

Roasted Squash Quesadillas

Makes 2 quesadillas: feeds one hungry student as a main course, or two for an appetizer

4 tortillas, corn or flour (doesn't matter, use what you can get cheaply)
1/2 cup winter squash, roasted
1/2 cup cabbage, shredded
4 T refried beans

1/4 cup salsa
1/4 cup sour cream

You can use any winter squash for this recipe: butternut, buttercup, acorn... whatever is on sale!  I like to roast the squash when I have something else going into the oven, just to save on energy (even though I don't pay extra for utilities, I know many of you do and I'm sure my landlady appreciates it).

You can roast the squash a few different ways, depending on how else you might use it that week. 

The easiest way is to chop it in half, scoop out the seeds, and place face down in a oven safe dish. Add a little water to the bottom of the roasting pan (1/2 cup should do) and cook for 45 minutes at 375 F. You will know it's done when you poke it with a skewer or long fork and the skewer easily pierces the flesh.  Allow to cool, flip over, and scoop out the flesh. 

You can also peel the squash, chop into 3/4 inch dice, toss with a little oil and roast. This is just a bit more fiddly and time consuming.  It will need a little less time in the oven if you do it this way, about 20 to 25 minutes, tossing from time to time to make sure all sides are nicely caramelized.

On to the quesadillas

Heat 2 tsp oil in a large frying pan. 

Add one tortilla. Top with half of the refried beans, squash, and raw cabbage. Spread ingredients around until about 1/2 inch from the edge. Put another tortilla on top, as a lid, and flatten with your egg flipper (or spatula, as I'm told it's properly called!)

Cook on medium heat until golden (I didn't time this... I'd say about 3 minutes each side, but peek every now and then to make sure it's not getting too brown). Flip, and cook the other side.

Repeat with remaining ingredients, adding a little more oil to your pan for the second quesadilla if it needs it.  If you have a no-stick pan you probably can do without the oil.

Cut into quarters, and serve with salsa and sour cream.

You'll notice I don't use cheese in my quesadillas. That's because I had a horrible gallbladder infection in the summer and I was on a very low-fat diet. Now that I can have cheese again, I don't find that I miss it. The refried beans keep the tortillas mushed together quite nicely, so you don't really need it to stick the layers together.

As for the cabbage... be brave!! I first added cabbage to my quesadillas when I had some leftover coleslaw mix in the bottom of the fridge and wanted to use it up.  It makes for the most AMAZING crunch in the quesadillas, although it's not authentic at all. If you aren't sure, just add a little bit on your first attempt and then add more next time if you like it.


Today's homework (show warm and cool tones in the same photograph)
First I roasted the squash, then I photographed it,
and now I'm eating it in a quesadilla for dinner!

Saturday, November 3, 2012

No Frills, the monthly shopping expedition

No Frills
Photo by Gary Wood
It's the beginning of the month, which means it's time to head to the supermarket to stock up on the basics.

No Frills is a popular chain for thrifty shoppers here in Canada, as their approach is, well, no frills. They forego all the usual advertising, marketing, and fancy displays in order to keep prices down. It's not a warehouse, like Costco or Sam's Club, so you won't be buying a jar of salsa that will last you six months, but they are all over the city and accessible by foot or public transit.

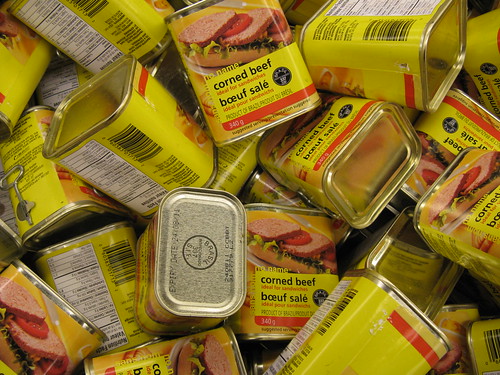
boeuf salé
No Frills generic corned beef
Photo by Danielle Scott
They stock their own generic, no name brand of many basic food items. You can find thousands of no name grocery items -- pasta, canned veggies, sauces, canned meats, frozen foods, cheese, household cleaners, pet food and litter, and more.  I'm a big believer in buying the generic brand of foods -- I'm told it all comes from the same factory, anyhow.

Although No Frills is cheap, they are NOT always the cheapest in town.  And here's where the web comes in.  No Frills has a price comparison website: Won't Be Beat. You can enter your local No Frills store, and then ask the site to compare the No Frills price against the other supermarkets in your town.


Dried Apricots
Dried Apricots - the inspiration
for the Armenian stew
I like to cook based on what's fresh at the veggie store, and what mood I am in that week. Am I craving Thai food? Curry? Soups?  Did I find an interesting veggie, new to me, that I want to try?

I am often trying new recipes, based on the ingredients I bring home, which I think is the opposite of many thrifty bloggers who rotate a standard menu of favourite dishes.

Yes, I have favourites, but there are so many new recipes to try out there! And new ingredients to explore!! Why limit myself?

So here's how I figure out what I need at No Frills -- I ask, do I need:
  • flour
  • sugar
  • butter or margarine (whichever is on sale)
  • tinned tomatoes
  • pasta and rice
  • salsa (cheaper at No Frills than making my own, except for summer)
  • dairy
  • pet food
  • pet litter
On a weekly basis I go to the veggie store, and around the corner to my local health food store, The Nut House, for small amounts of spices, herbs, and nuts. I only buy a small amount as spices and herbs lose their flavouring after a very short while, and why spend $3 or $4 on a jar of spices when you only need 1 or 2 tsp.

So here's what's I will be cooking this week, based on the ingredients I have on hand:

BREAKFASTS
  • toasted bagels with green onion and chive cream cheese
  • scones
  • oatmeal

LUNCHES and DINNERS (I cook on the weekend, and reheat during the week)
  • lentil apricot stew w sesame rice (never tried this one before, but have lentils, rice and dried apricots in the cupboard)
  • carrot ginger soup (big bag of carrots in the fridge)
  • cornish pasties (with the rutabaga i bought last week, plus lentils, potatoes, carrots, and herbs)
  • jamaican patties (winter squash and hot peppers)
  • braised celery and mashed potatoes
  • quesadillas (winter squash, refried beans and cabbage, with salsa and sour cream)
  • eggplant and lentil chile mole (never tried this before, either)

SNACKS
  • apples
  • brownies

I will post the recipes, with photos, as I cook these items.

Friday, November 2, 2012

Cabbage Rolls

Last Saturday's shopping

This is the haul from last Saturday, and it will feed me for 10 days or so.  You can see: 2 cauliflowers (they were on sale at 2 for $1.00 so I got both), large bag of mushrooms, a small butternut squash, a buttercup squash, an eggplant, fresh tomatoes, apples, an onion, a green cabbage, dried apricots, raisins, a rutabaga.  I have the staples -- flour, shortening, vegetable oil, tomato paste, spices, brown rice and pasta already in the cupboard from an earlier shop.

Total cost for the veggies and fruit? $11.00

So far I have made cabbage rolls, cauliflower and lentil soup, and a vegetable curry from my haul. Here's my recipe for veggie cabbage rolls.

Cabbage Rolls

For the stuffing
1/2 c brown rice
1/3 c raisins
3/4 c white beans
1 T red wine vinegar
1 tsp. mixed italian seasoning, or to taste
1/2 tsp. hot pepper flakes, or to taste
salt and pepper, to taste

For the roasted veggies
4 cloves garlic
1 cup tomatoes
1/4 onion 
1 c. eggplant
1 T oil

For the sauce
1 tsp oil
1/2 onion
4 cloves garlic
1 red pepper
6 tomatoes (or a tin of tomatoes if you don't have fresh)
1 c mushrooms
1 tsp each basil, oregano, thyme
1/2 tsp hot pepper flakes, or to taste
1 tsp sugar

8 cabbage leaves, blanched

My brown rice and roasted veggie cabbage rolls,
served with a lovely, spicy tomato sauce.
These were delicious!!


1. Add 1/2 cup brown rice to 1 cup cold water. Bring to boil, and put a lid on your saucepan, and reduce to lowest heat. Cook until water is absorbed, 20 to 25 minutes. I know my rice is done when there are little dimples on the top of the rice.

2. Dice ingredients for roasted veggies into about 3/4 to 1 inch pieces (except the garlic), toss with 1 T oil, and roast on a flat tray in the oven for 30 minutes at 375 F.  Inspect from time to time, flipping as necessary so that all sides are roasted.  Allow to cool, and at this point chop or smush the roasted garlic (it will be very soft).

3. While rice is cooking and veggies are roasting, prepare the tomato sauce. Saute onions and garlic in oil for 4 - 5 minutes, over a medium heat, until softened. Dice red pepper and tomatoes, slice mushrooms and add to pan.  Add herbs and spices. As the sauce cooks the tomatoes will begin to break down and the sauce will thicken naturally. If it is too watery, you can add a little tomato paste, and if it seems too dry, add a little water, 1/2 cup at a time.

4. When the rice and oven roasted veggies are done, toss these together in a large bowl with raisins, white beans, red wine vinegar, italian seasoning, hot pepper flakes, and salt and pepper. 

5. Blanch 8 leaves of cabbage. I read that the best way to do this is to put the whole head of cabbage in a large pot of boiling water, but as I was only making 8 cabbage rolls I elected to blanch the 8 leaves separately. Carefully "peel" the outer leaves from your cabbage. It gets harder, the closer you get to the centre. Drop one at a time into a large pot of boiling water, and cook for 3 minutes. Fish out with a pair of tongs. Let cool, and now you are ready to assemble!  If you are struggling with peeling the cabbage and know that you will use the rest of a boiled cabbage within a few days, go ahead and dunk the whole thing! I wanted to save my cabbage for coleslaw, later in the week.

6.  Watch minutes 3:01 to 4:00 on this youtube video to see the best way to stuff and roll your rolls (remember, our recipes are not the same!!)


7. Now that your rolls are assembled, place nestled up against each other in an ovenproof dish, an 8" x 8" dish should be large enough.  Pour the tomato sauce over the top, and cover the dish with foil.

8. Bake at 375 F for 30 minutes.  Your ingredients are basically already cooked, you are just allowing them to blend together in the oven.

9. Enjoy!!

Welcome!

Welcome to Eat More, Spend Less -- a blog about thrifty cooking, shopping, and eating based in Toronto, Canada.

Why this blog? I am passionate about local, healthy, and affordable food. 

For the past 3 1/2 years I have been living on ODSP, which is a government support program for people with disabilities. My monthly cheque is $1,200.00.  Out of this I pay rent, transportation, groceries and for therapy. Money has been tight.

Lansdowne Paton
photo by Adityo Sastromuljono
Bloor/Lansdowne
Last spring I decided that I wanted to take steps to leave disability and retrain as a commercial photographer. Now I am a first year student in Photography at Sheridan College.  This means that money is even tighter.  I received a combination of loans, grants, and scholarships to pay for my tuition. School pays for therapy. But everything else comes from my ODSP cheque.

Just so you know what we are talking about, on a very concrete level, out of my $1,200 a month I receive, my budget is $750 a month for rent, $40 for my cell phone, and $310 in commuting costs (subway, GO train, and Oakville transit). That leaves less than $100 a month for everything else. 

There are, of course, additional costs for school on top of tuition, such as printing my assignments so that they can be handed in and graded, as well as props and accessories for photo shoots. 

So now I have a grocery budget of $60 - $80 a month (that's $15 - $20 a week), which leaves a little bit for everything else (printing, postage, vet bills for the cat, and savings for a rainy day).

So that's a little bit about my background.

Waffle Headphone
photo by Adityo Sastromuljono
Bloor/Lansdowne
But what you really need to know is that I LOVE to cook, and I LOVE Toronto. I live in this amazing city. Our population is about 2.5 million (6 million if you count the outer boroughs), and it is incredibly diverse.  30% of our population are recent immigrants, and collectively we speak over 140 languages.  50% of Toronto's citizens were born outside of Canada.

Within steps of my apartment, in the Bloor/Lansdowne neighbourhood, you will find a Latin American grocery, a Bengali supermarket, a mosque, 2 West Indian restaurants (Queen of Patties and Vena's Roti) , a South-East Asian vegetarian restaurant, a Middle-Eastern fast food shop, a French bakery, and a Portugese bakery, a Vietnamese restaurant, assorted art galleries, a Brazilian capoeira company, a bicycle DIY place, and I'm sure I'm leaving out a bunch of places.

I look forward to sharing thrifty recipes, cooking, and shopping tips with you in the coming months! Welcome.